Exactly the same angles get applied repeatedly once again, like the flat-lay shot from above along with the low-about-the-desk shot within the aspect.
5 Foods Pictures Tips to Promptly Boost your Pictures in Miami.
In the following paragraphs, I explain 5 very simple but helpful procedures to very seriously degree up your foodstuff photography. I also provide a lot of prior to/following illustrations, so you can see how each idea will influence your photos in realistic scenarios.
These are generally the exact methods I exploit to capture continuously lovely food stuff shots in my Specialist function, and – I guarantee you – they’re not tough to adhere to.
So should you’re Completely ready to find out the way to photograph foods just like a Professional, then let’s dive appropriate in, starting with my primary tip:
1. Pick an angle that tells the story.
Take a look at sufficient Expert foods photography, so you’ll start to see a sample:
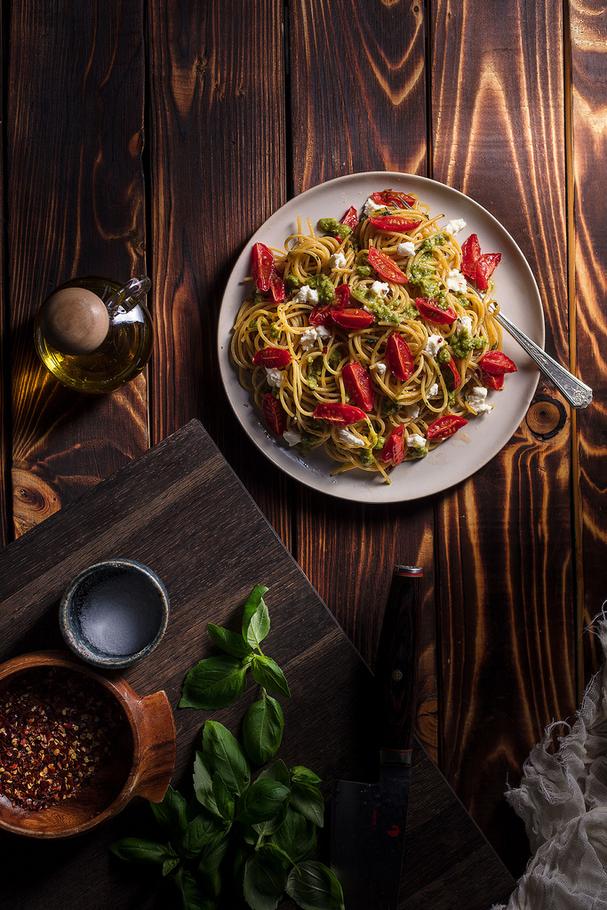
Exactly the same angles get employed over and over yet again, including the flat-lay shot from higher than as well as the reduced-in excess of-the-desk shot through the aspect.
I highly propose you use these angles as your compositional starting off points. Even so, don’t just pick a person at random; rather, you must very carefully establish the correct angle on your shoot.
Why? For the reason that where you place the camera will affect the sort of story you inform . And any time you get down to it, foods images is all about telling stories.
So as you arrange your composition, visualize the foods. Detect its dimensions, shape, peak, and what makes it exclusive. Then angle the camera in order to very best highlight these characteristics.
Take a look at these salmon tacos:
Here, I wished to demonstrate all of the substances and beautiful shapes created by the tortillas and filling. The low-angle shot appears to be good, though the overhead shot does a better position of telling the story.
2. Select a hero object and encompass it in Miami, Florida

An easy food images set up must begin with a hero item – which is, the point of interest within your photoshoot, the item you need to spotlight. Frequently, This can be the most important dish.
So detect your hero object. Put it around the table.
Then encompass it with props that relate towards the food stuff. Components, sauces, oils, and cooking utensils can all inform the story of the meals’s preparation. Tins, jars, herbs, glasses, fabrics, and linens can trace on the origin of the dish or the season where it is served.
Don’t go overboard, not surprisingly, but do spot some objects from the foreground and track record. These will elevate the story in the shot, additionally they’ll give your composition physical depth.
Inside the image of baklava beneath, my props increase for the Tale. You may have the hero item – the bowl of foods – however, you even have the ingredients (the pistachios), as well as a couple of background products so as to add depth and established the scene. The viewer is quickly strike by a way of area that describes the Arabic origins of the scrumptious sweet.
3. Modify natural light-weight for essentially the most flattering food stuff pictures.
In food pictures, light-weight is king. Bad use of sunshine will ruin your photographs and turn off your viewers. But if you can learn the way to control The sunshine, it is possible to promptly bring your food items shots to the following degree.
I wish to use all-natural light-weight in my food stuff photos in Miami. I build close to a window, so I have an abundance of light streaming in. But I don’t function with unmodified mild; as a substitute, I include different modifiers so I may get the most wonderful outcomes.
First within the record: Place a diffuser amongst the window plus the foodstuff, especially if you’re working with immediate sunlight.
You see, immediate daylight generates tricky, dim shadows and vivid highlights. These can be distracting – but by adding a diffuser, you are able to soften The sunshine, lessen the shadows, decrease the highlights, and obtain a stunning impact. Notice that you could buy a diffuser for affordable from any images retail outlet, but you also have the option to generate a diffuser of your personal (just dangle a thin white bedsheet before the window).
Immediate purely natural gentle can provide really hard and described shadows (check out the shadow beneath the lemon cake within the still left). But with somewhat enable from an affordable diffuser, I had been able to soften the shadows (as it is possible to see inside the picture on the appropriate).
Up coming, I recommend attaining some white and black cards. You can make these your self employing foam core boards (acquired from virtually any craft shop).
Only use the white cards to bounce gentle into shadow regions and expose essential promotions. Utilize the black cards to fortify shadows for more distinction. Don’t be afraid to experiment with diverse card styles and distances until you can get the result you need.
Finally, I've a lights mystery to suit your needs, termed blocking . From time to time that pesky mild will fall on your background or props and bring about them to be as bright or simply brighter than your subject matter.
This is the large no-no, as you desire the viewer to usually search very first to the subject matter, but the answer is straightforward: make use of your black playing cards to dam mild from hitting regions that may compete with all your subject. (This is often also an important approach for building darker, very low-key styled illustrations or photos.)
Look into the two illustrations or photos down below. The shot on the left provides a way too-dazzling history, so I included a black card to ensure the cake remained the brightest Element of the photo:
Here's the final graphic, with a diffuser softening the window gentle, a white card filling during the shadow on the lemon frosting, and also a black card blocking The sunshine about the qualifications:
4. Use lines and levels for the best compositions in Miami.
I’ve explained the value of surrounding your hero item with props – but you have to guarantee these props don’t distract from the leading issue.
That’s wherever two straightforward composition approaches come into play: strains and layers.
The thing is, by carefully arranging your props in traces and levels, it is possible to direct the viewers’s eye to the key matter. Then the viewer received’t get distracted by props; instead, the props will serve the image as a whole.
So creatively use your props to sort strains. During this shot, I’ve employed a spoon to immediate the viewer straight toward the bowl of baked peaches and ice product:
Under, I’ve shared A different illustration of very careful utilization of lines. From the remaining-hand impression, I’ve positioned the cutlery to produce the round of Brie, and in the appropriate-hand impression, I’ve long gone marginally a lot more abstract, allowing the knife and pomegranate seeds create strains that frame the subject.
I also advocate employing levels to generate 3-dimensional compositions. You’ll choose to shoot in the facet (so your digicam is positioned small more than the desk), and it is best to add a variety of props staggered in front of and powering your subject matter. For pictures like these, a shallow depth of field can prevent the props from getting way too distracting.
The Brie inside the Picture underneath is about in the midst of various props and two big out-of-concentrate parts. This generates A 3-dimensional layered effect and sends your eyes straight towards the hero item:
five. Simplify your compositions by limiting the colour it is straightforward to complete in Miami and Florida
When I was just beginning being a food stuff photographer, I frequently produced A serious blunder:
I would incorporate in colorful props – and they would upstage my food and get all the eye.
As an alternative, after you hunt for props, backgrounds, and tableware To place inside your illustrations or photos, don’t get way too shade-hungry. Seek for objects with neutral tones: grays, browns, blacks, silvers, whites.
Then, when placing products into your food photos, select props which the foodstuff can definitely pop from. During the shot underneath, I’ve utilized a black metallic tray and baking paper to amplify the brilliant purple strawberries and rhubarb inside these Crostatas. This way, the foodstuff steals the show – plus the props, although complementary, don’t distract from the key occasion.
Foods photography ideas: closing words.
Now that you just’ve concluded this post, you understand how to photograph food items similar to a Professional – this means you’re ready to commence capturing some breathtaking foods shots of your own personal.
Just remember to spend very careful awareness to The sunshine and the composition. Like that, your cooking images can definitely shine!
Now in excess https://attractivephotography.com of to you personally:
Which of these food items photoshoot strategies do you propose to use? What types of food do you prefer to photograph? Share your thoughts (and pictures) within the comments under!